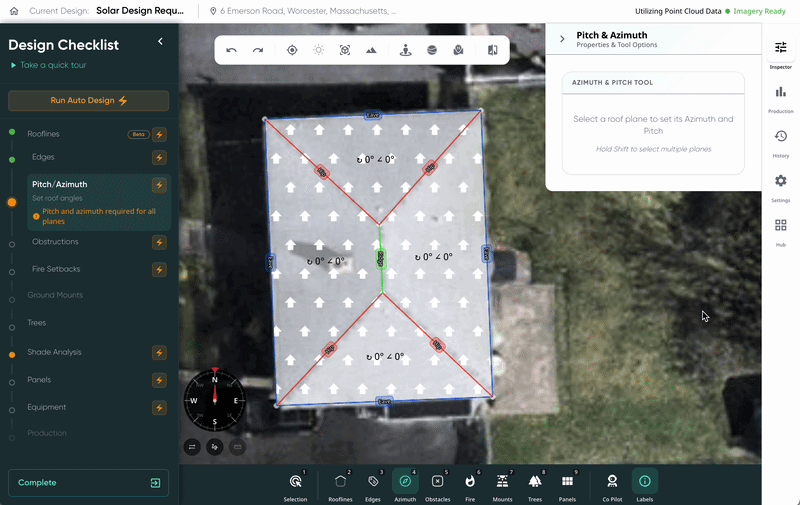
Setting pitch and azimuth for you design is important in ensuring the accuracy of your design's production. This step will occur after the rooflines are drawn and labeled, and both pitch and azimuth will be drawn at the same time.
To draw the pitch and azimuth of your design, follow these steps:
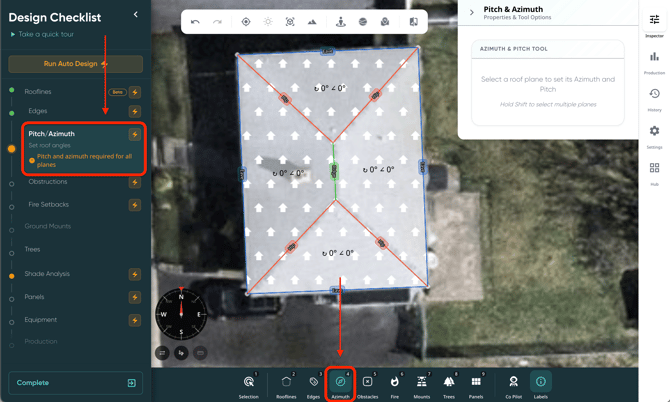
- Click on the 'Pitch/Azimuth' step OR click on the 'Azimuth' tool on the bottom toolbar.
- You can also use the keyboard shortcut by clicking "4" to jump to the tool.
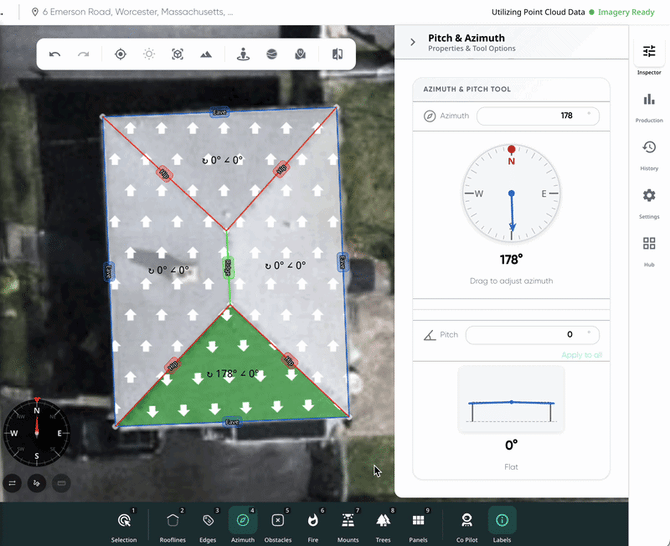
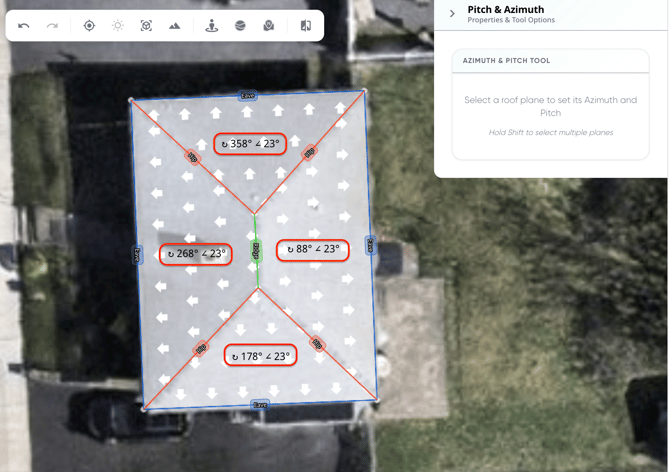
- Hover over the roof plane you'd like to adjust, then hover over the top or bottom roofline of the plane. When the arrow is pointing the direction the roof is facing, left click. That will set the roof plane's azimuth.
- Next, use the inspector on the side to enter the pitch and azimuth of the roof plane. When you change this number, the roof outline will change to reflect the angle you've entered.
- If you'd like to quickly apply this pitch to the whole roof, click 'Apply to All'.
- Repeat for every roof plane!
- You can see the current pitch/azimuth on each roof plane.
The pitch and azimuth of each roof plane can be drawn automatically using the 3D point cloud data for the location. Just click on the lightning bolt icon ⚡ in the Design Checklist!